
I was just experimenting one weekend trying to make some different room views for my
"Special Websets" images. I decided to write this tutorial to share how I did this version and to show that they aren't really that difficult if you want to
experiment too. You can use different pattern fills for a wallpaper look or plain colours or even half and half.
If you want to peek at my two finished room samples before you begin, they are at the end of the tutorial.
I place absolutely NO restrictions on the use of this tutorial or your finished image. I have included the carpet sample and the wallpaper sample
in the zip file.
This same idea, only for making windows, is in a great tutorial I recently did on making a marble room. It is a good one you should go and have a look at.
You can visit it by clicking here
This tutorial was completed using PSP7 but can easily be done in PSP6.
What You Will Need:
Paint Shop Pro: download a trial version here
Zip of my image files: you can download it here
(includes carpet and wallpaper sample)
PLEASE save your work often!! I did it after every layer. It is better to be safe than sorry.
(1) Open a new image 500 x 400, 16 mil colours, transparent background.
(2) Create a new layer and call it "rightfront". Open up the wallpaper image and set it up for your foreground fill, background null. Use it at
100% size and angle 0
(3) Double click on the square dotted selection tool to have the window appear.
Where it says left - insert the number 200.
Where it says
right - insert 500.
Where it says top - insert 0.
Where it says bottom - insert 250.
Click okay to apply and an
area will appear on your image.
(4) Flood fill with the wallpaper sample and then deselect.
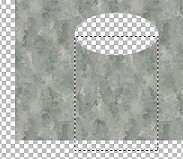
(5) Click once on the same selection icon, set if for "ellipse", feather 0, antialias checked. Start at approximately 380 over and 60 down.
Pull out the shape until it reaches approximately 454 across and 97 down. Watch the numbers in the lower left of your screen. Do the best you can and if yours doesn't match mine exactly that is okay because we are making the
arch for the top of the doorframe. If yours is bigger or smaller, it won't make any real difference. Then, either click on the scissors or hit the keyboard delete key to remove
this section of the wallpaper. Deselect.
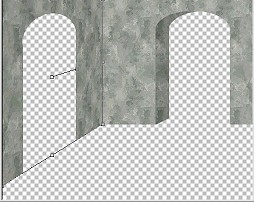
(6) Click once on the same selection icon, set if for "rectangle", feather 0, antialias NOT checked. Look at the image below for what we are going to do next.
Zoom in, if you have to, to get a better look. You need to start your selection just near the middle of the ellipse before it starts to curve back inwards. You want to get as straight a line down from the
ellipse as possible. Then drag it over to the other side of the ellipse to the same point, then drag down and below the wallpaper. Hit the scissors or delete key again to remove this section of
the wallpaper and to complete the doorway arch. If you have zoomed in, you may have to cut the wallpaper away in 2 stages so you keep your top right part aligned properly.
(7) Duplicate this layer and call it "right back". Go to colours - adjust brightness - change to minus 35, leave the contrast at 0.
Using the arrow tool, move the wall section a little to the right. It doesn't matter how far, this is only for making it easier to "grab" in the next step. Go to
layers - arrange - move down. Click on the arrow tool again and move the darker wall over a bit more, (keeping it lined up at the bottom with the lighter section) until the dark
section at the top disappears at about the middle of the arch. We are now going to make a diagonal cut to the bottom to simulate depth. Check the image below.
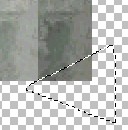
Click on the lasso tool and set to "point to point" antialias checked. I like to start a little below and left of the exact corner, so left click there, then move up to make a diagonal cut, left click, move down out of the way and left click, then go back to the beginning and right click to finish.
Then hit the delete or scissors. Deselect.
(8) Go back and click on "right front" and duplicate this layer. Rename it "left front". Using the arrow tool just move it down to the centre of the image. This is to make it easier for the next steps. Go to
Image - mirror. The go to colours - adjust brightness, put in minus 20 and leave contrast at 0. Then apply.
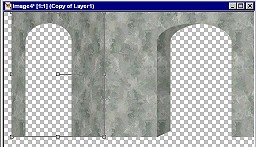
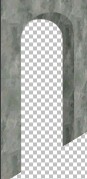
Click on the deformation tool. Grab the middle square box on the left side and move it to the right to make the image thinner for ease of moving and fitting it in the right position. Grab the box in the exact centre
and move the wall up to the top so the right side lines up with the other wall section. See the image below.
Grab the centre box on the left side and pull towards the left to make the image wider but don't go all the way to the edge yet. You want to leave yourself just a tiny space to make
grabbing the deformation boxes easier. Now we are going to form the direction of the wall. See the image below.
To do this, hold down the shift key while you grab the lower left box and pull downwards to almost the bottom of the image. When you have reached that point, release the shift key, grab the left centre box and then just pull it to the left until you reach
the edge of the image. Then double click inside the deformation box to apply.
(9) Duplicate this layer and rename it "left back". Go to colours - adjust brightness - insert minus 35 and leave the contrast at 0. Click okay to apply.
Click on the arrow tool and move the wall to the left again for ease of moving. Go to layers - arrange - move down. We need to line up this section a little differently than we did with the other wall.
Align the dark part so it forms a straight diagonal line with the front of the wall. The dark part at the
top will disappear a little more towards the left of the arch this time.
(10) You can use the lasso tool or the selection tool set to rectangle, no feather and no antialias to make the cut. Choose whatever you are more comfortable with.
We are now going to remove the point of the dark wall level with the edge of the front wall. Then deselect.

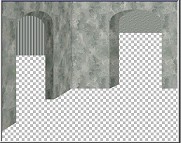
(11) Create a new layer called "rightroomwall" and go to layers -arrange - send to the bottom. Set your foreground colour to #989D96, background null. Using the square selection tool set to rectangle, no feather, NO antialias,
select an area from the top of the image, to about a third of the way down the arch, and that will be wider than the door opening. Flood fill and I added a texture here just to take away the plainness of the wall surface. I used texture #2 set to 50%. Deselect.
(12) Create a new layer called "leftroomwall" and go to layers -arrange - send to the bottom. Set your foreground colour to #B4B8B2, background null. Using the square selection tool set to rectangle, no feather, NO antialias,
select an area from above the arch, to about half way down the arch, and that will be wider than the door opening. Flood fill and I added a texture here - blinds - width 8 opacity 48 shadow colour - black. I decided this would be a good way to make it appear as if I had drapes on the wall.
(13) Create a new layer called "carpet". Go to layers -arrange - move to the bottom. Open up the carpet sample, set it as your foreground fill - size 100 direction 0. Flood fill.
(14) At this point I wanted to add a little more depth with a drop shadow. I admit here quite readily that I am still learning all the intricacies of PSP and in applying the shadow I had to do a little erasing as well.
Go back and make active the "rightback" layer of the right wall. We are going to add a drop shadow using
vertical.....minus 3
horizontal.....3
opacity.....40
blur.....17
After this was applied, I wanted to remove any traces of the shadow
that might appear at the bottom and make it look as if the wall was standing off the carpet. I used the selection tool set to rectangle and ran a selection level with the bottom of the wall and down lower and then hit the scissors.
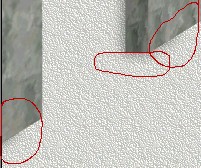
(15) Go next to the darker section of the left wall ("leftback") and make that layer active. Apply the same drop shadow and check the image below for the parts I had to erase. I used the eraser tool here set to 5.
If on the diagonal section you remove a bit of the back wall - don't worry - it doesn't show. The only part to be careful of is the section where the dark wall shows.
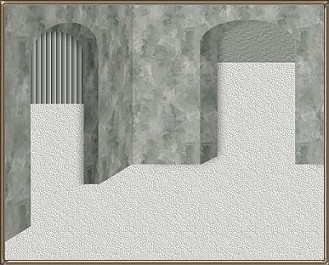
You have now prepared your image to take all the tubes and goodies you can add to decorate your three rooms. I imagine you already peeked but here is the sample I did
using the image you just completed.
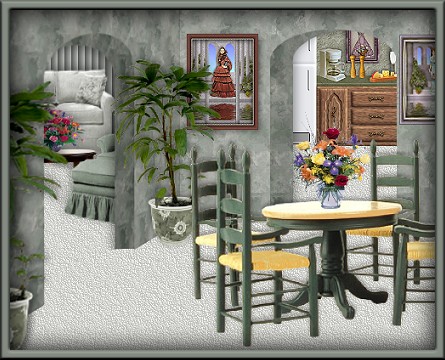
The kitchen part was an image I did for a tutorial by Burn and I also made it into a webset in my "Special Webset" section. It pays to keep copies of things so they
can be colourized or resized and used again and again.
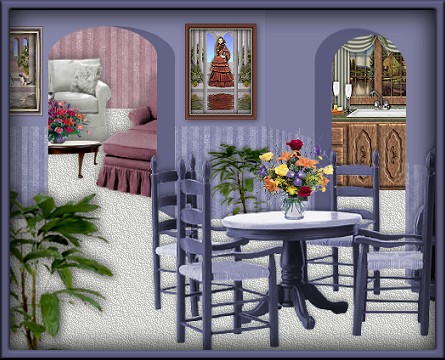
Here is the blue sample. I didn't take time to add baseboard or molding but I did do half wallpaper. I did that section before the wall was deformed and still flat. That way the wallpaper deforms
automatically with the wall. I also changed the left wall to the right and the right wall to the left for a different look.
I have been having a lot of fun designing these room images lately. If you have the time to check out "Pat's special Websets" you can see some of the other room layouts
I have tried to create. If there is anything there you would like to learn how to do, drop me an email and perhaps I can create a tutorial for other images like this room layout.
I hope you have enjoyed making your room layout. Make changes in patterns, colours, etc.
If you have any problems or need further explanations, please feel free to email me here
MAIN TUTORIAL LIST
This tutorial was posted at the site of "P. Ann's Place" October 24,2002 and written
by Pat Sherman.
All I ask is that you do not claim it as your own.
|
|