
Several people have asked me lately how to take the animated skaters and ballerinas I offer in the Poser People section, and add them to a background. There are two ways that I do it, so I will try and explain both as easily as I can. I did not resize these images from when I offer them originally so they are really larger than what I would use with a background, but for demo purposes they are fine. I encounter difficulties since I am still on dialup rather than cable, so my uploading and loading times are extremely slow. I have two zips ready for you to download below, that include images 1 to 6 in zip one, and images 7 to 12 and the background in zip two. The images were created in my Poser 5 programme and then the original was rotated 30 degrees then copied and saved in PSP. That was in turn rotated 30 degrees in order to make the full circular rotation of 12 images in total. They have all been placed in the individual images so the animation keeps the ladies in their perfect placement. This is why I have been asked how to add the background yet still keeping the ladies in perfect alignment and not throwing off the rotation.
An example of what you will be creating is at the bottom of the page. I had it under the title but it seemed to hinder the rest of the images from loading so I moved it to the bottom.
If you wish to resize them, you may follow your favourite method, either in PSP or in Animation Shop itself. I am not expert enough in Animation Shop yet since I really only use it for making my snowglobes with 3 or 4 images total. I prefer to resize and then sharpen each image individually adding the same steps to each image keeping them identical in the end. So with image 1, I might resize 75% and then use the "unsharp mask" until I get what I like. Then I repeat these identical steps on the remaining 11 images. I know there is an option in Animation Shop to resize an animation but I have never tried that yet without it looking more of a softer image and not as crisp as I may prefer. However it does work not too badly. The animation above is 75% of the size you will be creating but I resized here for loading time..
Now I prefer to use PSP7 still, yet I do have 8,9,X as well. Animation Shop is very similar in every version so I have used the basic images which are the same as the others from my version of PSP7.
I place absolutely no restrictions on the use of your finished image since you have been the one to do all the work.
What You Will Need:
Paint Shop Pro and Animation Shop
Zip One of my image files: you can download it here
Zip Two of my image files: you can download it here
Adding a Background Version One
(1) Open one of your skater images to see the size or dimensions of each of the 12 images. This skater is sized at 180 by 485.
((NOTE: You would do this for any animation you wish to use. The idea is to make a background the identical size of the animation. If you were using another animation and the frames were 250 by 300, then you would create a new image 250 by 300 for creating a new background for it.))
(2)Create a new image the identical size of 180 by 485 to create your background. You can use one image and then place it in the most pleasing spot for the background you would like or create one using tubes etc to make an original to your own liking.
If you wish to use the background included, the size is larger than you will need for this version of adding a background, so duplicate it, and then crop it down to 180 by 485. Since I am still so dependent on PSP7 and am not so familiar with the workings of the other versions, in PSP7 you can do this by double clicking on the crop tool. A window will appear and you can fill in the size you wish. I used Left 0 Right 180 Top 0 Bottom 485. You can double check underneath those numbers as the size of the image will appear to make sure you have the size you want. Or, with this image, you could go to Image resize, and fill in the pixel width of 180 and the height of 485 but make sure you UNCHECK the part at the bottom that says keep the aspect ratio the same. The trees get a little thinner but they still look okay and even better when you sharpen the image after the resize.
(3) Open up each of the 12 skater images. Here is where I duplicate each one so I can keep the originals for another image at a later time. ((Just remember later on when saving, to number or name them in the same order so when you take them into animation shop they will animate properly)).
(4) Return to the new background image you just prepared and copy it. You can use the shortcut of holding down the control key while your press the letter C.
Go to skater image one and and make it active. Then using the shortcut of holding down the control key while you press the letter L, paste your background as a new layer. Arrange the background layer below the skater and then go to layers "merge the visible". Do this identical step for each of the 12 skater images.
Name them in the same order (1-12) and save them in psp format.
(5) Open up Animation Shop and get ready to animate. If you are really inexperienced with AS, then scroll down farther to Version Two of adding a background where I fully explain what to do when you open up AS and carry on from there to set up the beginning stages and how to save. For this version just skip the images of clicking and dragging specific to version two.
Adding a Background Version Two
These first steps are for creating an animation of a skater rotating first. This is for people who have downloaded the 12 images from my other section and really don't know what to do with them. If you already have a premade animation then you can avoid these steps altogether and just open your pre-made animation. All the steps of setting it up have already been done.
(1) Unzip your 12 images and the included background to a spot on the hard drive where you will be able to find them again.
(2)At this stage, I still like to open up PSP first and then open Animation Shop from the file menu. If you prefer, you can just open AS on its own.
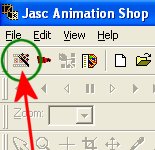
(3) When the opening page displays, you are now ready to set up your skating animation and your background animation. Sound funny? Open up the Wizard to start. Click on the icon as pictured below
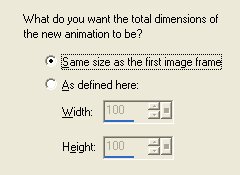
(4) The first window asks you about the size. Just follow my images for what to select.
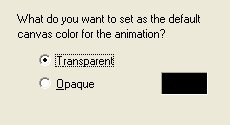
(5) The next window asks about your background. Right now for this one we want it transparent.
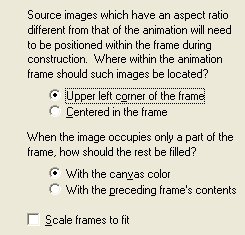
(6) More choices (really unsure of what they mean) but just click as below.
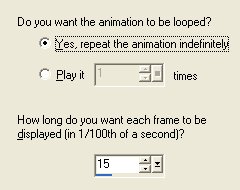
(7) Setting the animation and the speed. I set this speed at 15 but you can slow her down or speed her up depending on what you prefer.
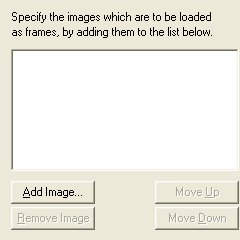
(8) This next window is where we will now start looking for the 12 skater images. Click on the button "Add image" and then it is time to lead your computer to your storage place.
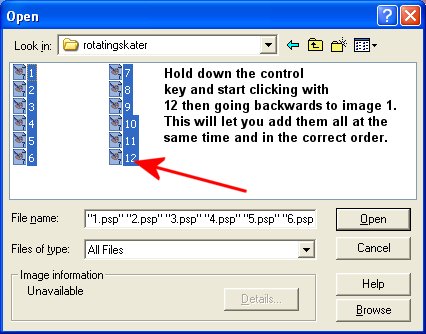
(9) This next window is where I stored my 12 skater images. After many times of adding each image individually, I learned a little trick that comes in pretty handy. When you start to add, hold down the control key while you click on each image, HOWEVER, click on them in the reverse order. When you finish clicking on 12, 11, 10....1, you will see that they are all added in the window below and surprisingly they end up in reverse order exactly as you want them anyway. Then click "open" and prepare for the new window to appear.
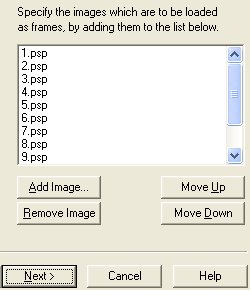
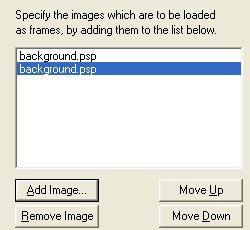
(10) Here is the listing of everything you have added and you can give it one last look to see that images 1 to 12 have been added and they are in the right order. If everything is okay, then click next.
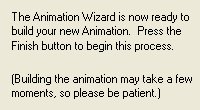
(11) This little window just lets you see it is ready to set up the animation, so read it and then click "Finish".
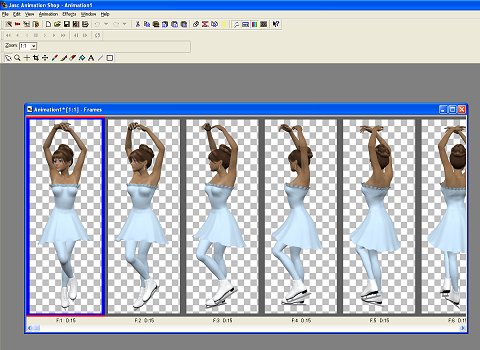
(12) Your animation will appear shown in all its 12 frames.
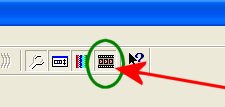
(13) If you want to check it out and see her speed or if everything is okay, click on the little icon in the top menu bar on the right. See the image below. To close, just click the X on the rotating animation but you will be left with your 12 frames. Now just for space reasons, minimize the 12 frame window and let it sit and hide at the bottom for now.
(14) Now we are going to make an animation with just the background image alone. Follow the same steps as above to start an animation and do the same speed of 15 that we used previously. When you get to the stages of adding the images, lead your computer to the background image and click on it and add. Keep repeating this step 11 more times to make a total of 12 frames to match the skater images.
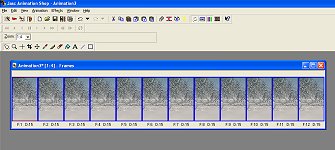
(15) Your animation when finished will appear in the window similar to the image below. I used the scroll button on my mouse to make the image smaller for viewing here.
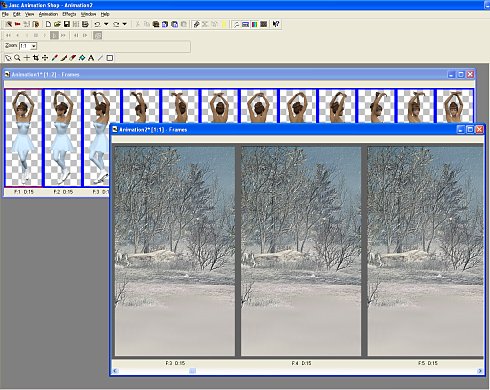
(16) Now open your skater image and have both showing in the window. If you can set it up like I have below, I think you will find it easier for adding one animation to the other. I used the scroll button on the mouse to make the skater half size and then I kept the background full size. I moved the skater off to the left so you can see frame 1 and I used the click on the right edge of the background image and made it narrower from left to right so you can see just the first three of the frames on the screen. Keep it full size because you will want to make a good judgement here while adding the skaters.
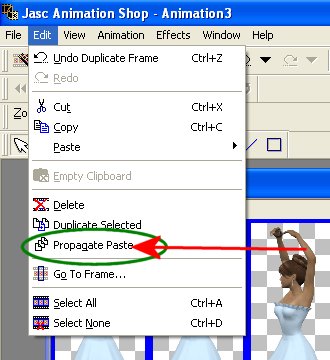
(17) Now the first step is to go to the menu bar at the top, click on Edit and then go down and find "Propogate Paste". Click on it, but you will notice that nothing happens. By clicking on this, it sets us up to be able to add the two animations. This ability stays in effect until you go back and click on this again to shut it off.
(18) Now make the skater the active image and go to the Menu - Edit and click on "Select All" or you can hold down the control key as you press the letter A. Then click on the background images and make sure all of them are selected as well. Make sure you can see Frame One of each animation because we are now going to drag the skater over to the background.
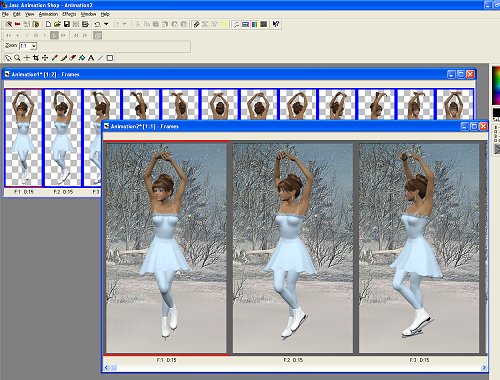
(19) Please read all of this section's instructions before transferring the skater to the background. You need to hold down the control key as you do this. This will allow you to copy the skater and leave the original intact. So, click on the arrow tool, hold down the control key, move up to frame one of the skater and click on her around her waistline. This will be about the centre of her. Keeping your finger down on the mouse button, start to drag her now. You might see an hourglass and then a circle with a line through it, and she will disappear for a moment but keep dragging until your arrow is over frame one of the background animation. The skater will appear in the image. Do not let go of the mouse button until you think you have her centred in the image. Just give it a good estimate by eyeballing it the best you can. When you think she is in the middle of the background, then release the mouse button. All of a sudden, since you have all the frames selected, all 12 skaters will appear in each of the frames and all your 12 skaters have been added in exactly the right places as they need to be. If you goof and she isn't in the right position, go to the Menu - Edit - and click on "undo the drag" and then start over again. It will look like the image below.
(20) Now you can watch the animation to make sure everything is okay. Click on the little button in the upper right of the screen (first image below) and you will now see your skater in action on her new background image working on her spins. (second image below).

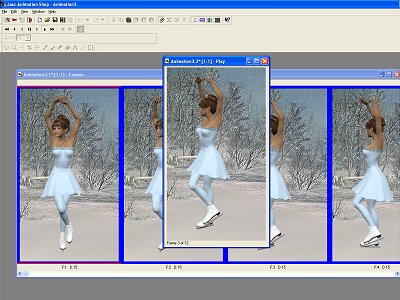
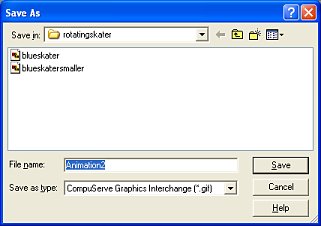
(21) If everything is okay, then we can go to File - Save As and give your animation a name as you save it. A window will pop up asking you where you want to save it and what you want to name it.
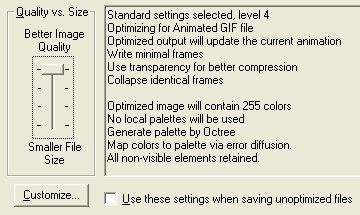
(21) After you click save, the next window appears giving you the level or how much of a quality animation you want. The one below shows level 4. I usually just leave it at this to start and click next.
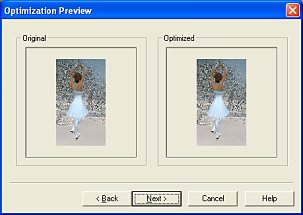
(22) The next window shows you a preview.
(23) The next window shows you the final size of your file and how fast or slow it will be for people to load it up on differing modem or cable speeds.
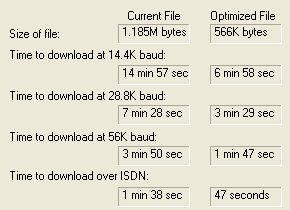
(24) As you can see, the file size is large being saved at the best quality and because of the size of the images we used. If this is too big, just click the back buttons until you get back to the quality screen and drag the slider bar down to Level 3 and try that. I did that for viewing purposes here and you can see the file size is a bit smaller.
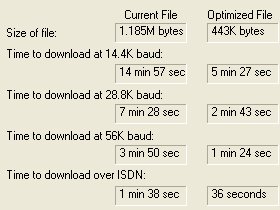
(25) Click on Save and your animation is complete. Now you can go back and close the background animation. You don't need to save it because the next time you might use it, you may need a different number of frames for the animation. You can also close the skater animation unless you want to save it for future use in case you want to use a different background for another animation using the same lady.
(26) This technique will also work for any animation you might already have premade. Just open it in AS and see it work, how many frames it takes and also check for the speed it uses so you can set up your background animation with the same matching speed. You can check for the size of each frame. Then go back to PSP, make a background the exact same size or larger and do the same steps as you did here for creating the background animation. You can then take and drag the animation onto the background in the same manner.
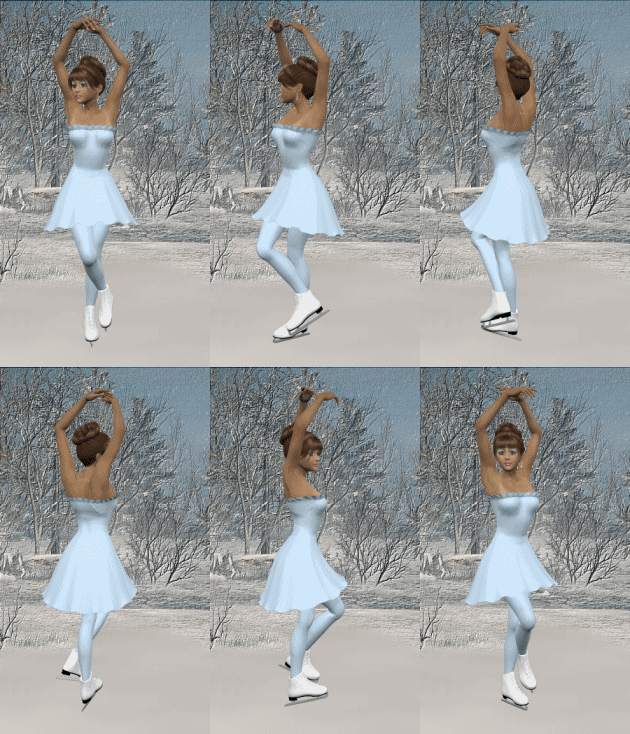
I hope this has been helpful for you in either creating an animation with the skater and ballerina images I offer and then adding a background to that image or any other.
If you have any problems or need further explanations, please feel free to email me here
TUTORIAL PAGE ONE
TUTORIAL PAGE TWO
TUTORIAL PAGE THREE
This tutorial was posted at the site of "P. Ann's Place" March 17, 2006 and written
by Pat Sherman.
All I ask is that you do not claim it as your own.
If you are in a group and want to use this as a lesson, please use the link freely and you do not have to write me to ask permission.
   
|
|