
I was just experimenting again, as usual.
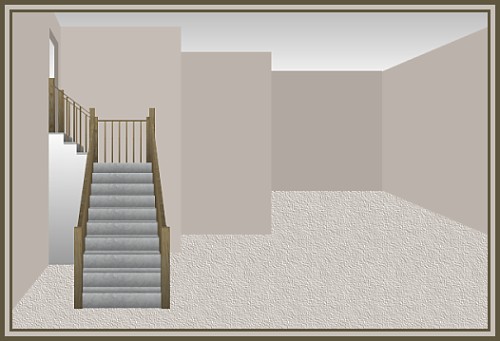
I call this "TALL walls" because that's what the room has.
This tut only takes about 9 steps to complete. I have included the stairs for you. I made these in another programme I own called "Architectural Series 18" created by
Punch. I use it to make houses and decks and some room shapes. This is the same programme I used to make the house images I have offered on the opening page. You can peek at my sample at the bottom but remember to leave enough time for it to fully download.
I place absolutely NO restrictions on the use of this tutorial or your finished image.
This tutorial was completed using PSP7 but can easily be done in PSP6.
What You Will Need:
Paint Shop Pro: download a trial version here
Zip of my image files: you can download it here
Zip of my selections: you can download it here
PLEASE save your work often!! I did it after every layer. It is better to be safe than sorry. You don't know how many times I still forget this and have to start all over again.
(1) Open a new image 600 x 400, 16 mil colours, transparent background.
(2) Create a new layer and load selection "ceiling.sel"
Set your foreground colour to white, the background colour to grey #C0C0C0 and choose linear gradient, angle 0, repeats 0, and fill the ceiling area.
(3) Create a new layer and load selection "floor.sel"
open the carpetfill image from the zip and floodfill at 100 size angle 0.
Just before we start the walls, let me explain that you can use my colour of beige #D0C8C0, any other colour you wish, or a wallpaper fill. You can decide now what you wish to do and then in all the following steps for doing the walls, we will always fill with the same colour or image and the changes occur by going and adjusting the brightness only and leaving the contrast at zero. So I will say only "fill the wall" and then adjust the brightness with the number you need for each separate wall.
(4) Create a new layer and load selection "wallone.sel"
fill the wall area and then adjust the brightness using "minus 20"
(5) Create a new layer and load selection "walltwo.sel"
fill the wall area and then adjust the brightness using "minus 30"
(6) Create a new layer and load selection "wallthree.sel"
fill the wall area and then adjust the brightness using "minus 20"
I forgot to do this in the first sample, but I did it in my sample. I applied a drop shadow of 4,4, 39, 10 then selected an area along the bottom of the wall to remove that part of the shadow that hung down too far and made it look as if the wall was off the floor.
(7) Create a new layer and load selection "wallfour.sel"
fill the wall area and then adjust the brightness using "minus 10"
I also applied the same drop shadow here as well.
(8) Create a new layer and load selection "doorshading.sel"
fill the area and then adjust the brightness using "minus 70"
(9) Create a new layer and load selection "wallfive.sel"
fill the wall area and make no adjustments to brightness at all.
(10) Create a new layer and load selection "stairs.sel"
Open the stair image from the zip and copy and paste it into the selection. You can do this by using the shortcut - hold down the shift key, the control key and then press the L key.
WOW! You are finished. Wasn't that a quickie one!!
Remember you can fill the selection pieces with any colour you want to. It is totally your choice. Just have fun and enjoy practising your decorating skills.
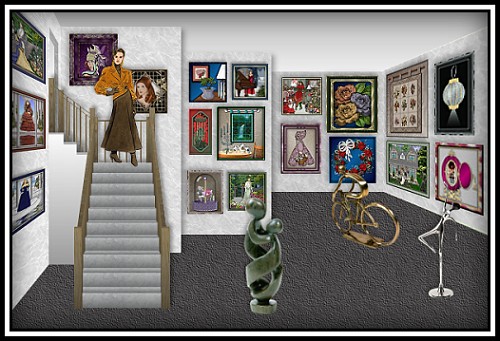
Here is my sample. I turned it into an art gallery sort of. All the paintings on the walls are ones I have done following tuts or experimenting or the small images from my special webset section. I added some tubes as supposed "sculpture" just to fill in the floor space because it looked so empty . If you are interested in how I did the paintings on wall one, I made a new selection the height of the wall from the measurements on the left and then made a rectangle. I pasted my four pictures on, then I deformed it to match the original. That way the pictures go exactly the right way and I don't have to rack my brains to get the right perspective.
If you have any problems or need further explanations, please feel free to email me here
TUTORIAL PAGE ONE
TUTORIAL PAGE TWO
This tutorial was posted at the site of "P. Ann's Place" June 12, 2003 and written
by Pat Sherman.
All I ask is that you do not claim it as your own.
If you are in a group and want to use this as a lesson, please use the link freely and you do not have to write me to ask permission.
   
|
|