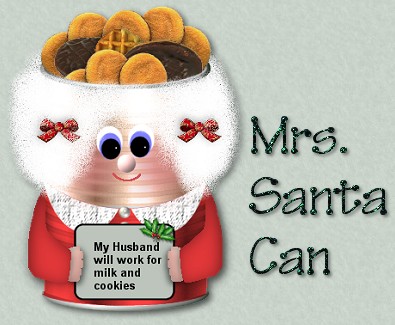
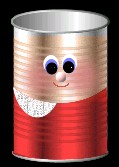
The inspiration for this Mrs. Santa came from the tutorial "Tin Can Santa" I just finished and the fact that
hardly anyone has tutorials on Mrs. Santa.
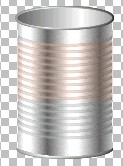
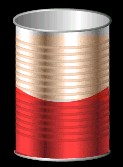
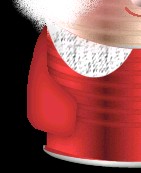
The tin can image you will work with was one I did following a great tutorial by Pinkfly. If you would like to try and make your own
tin can click HERE.
What You Will Need to Start
...PSP 6 or 7 (this was done in 6)...
...Visit JASC to download a free trial
... good knowledge of basic terms and tools...
...would help if you had done "Tin Can Santa" previously...
... the ZIP FILE HERE - includes can image, hairbow, pearl and a cookie
Please check the tubes that come with PSP. You should already have the holly if you wish to use it.
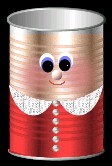
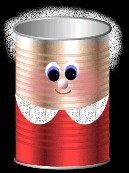
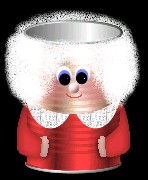
Open the tin can image. It has already been set up so you will start off with three layers.
One layer is the front of the can, then another blank layer for the cookies, and then the back of the can.
Create a new raster layer and call it "skin". Using the shape tool set to rectangle, filled, and using colour #E8D8D0,
draw out a rectangle roughly between the first ring on the can and the 12th ring. When completed, change the layer property from "normal" mode to "colour".
Create a new raster layer and call it "cheeks". Using the paint brush, no particular settings, and using colour #CF7373, draw a couple of circles for her cheeks. Then apply
a gaussian blur. On mine, I needed to use 9.00 but yours may be different depending on the solid circles you drew. Just apply whatever you need to meet your "yes, that's okay" level.
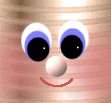
Open a new raster layer and name it "eyes". At this point, you can work off to the side and do a small white oval then a smaller blue oval, then a smaller black one.
Select the black oval and move it into position on the blue one, then move them both onto the white oval, then move the completed eye into position on the face. Then select the eye, copy and paste and move it into position for the other eye.
Now add a drop shadow. Choose colour black, opacity 60, blur 6, vertical and horizontal 2. I always finish off with just a 1 pixel size spot of white in each eye.
Create a new raster layer at the top named "noseandmouth". Using the flesh colour #E8D8D0 and the shape tool set to circle,anitialias, draw a small circle for the nose and apply an inner bevel to give it just a bit of shape.
You can choose your own settings for this depending on the size of your Mrs. Santa's nose. I did not use a drop shadow here.
Then using the paintbrush, set to 1 or 2 and using a nice darker pink, draw her a little mouth.
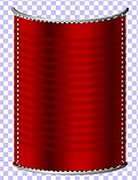
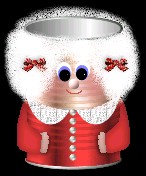
We are now going to add the red. Make the "frontcan" layer active. Using the selection tool set to rectangle, surround your can, then
click inside to have the "marching ants" surround your can. Go to selections - modify - contract - 6. This should bring your ants to just below the rim of the can. Keep this area selected and create a new layer and call it "red". This layer should be just above the front can layer.
Floodfill the area with colour #FF4040. Click on the deformation tool and rearrange the left and right sides so they extend to the edges of the can. Then change the blend properties of the layer from "normal" to "multiply".
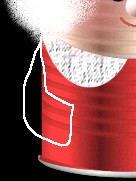
At this point, choose the selection tool set to ellipse. Check the picture below centre. This picture is displayed with the face hidden
so you can have a good look at the area of red that will be removed and what will remain for her dress. Starting at the top middle of your can, extend the ellipse down to below
the half way mark or just under your face area. Then hit your keyboard delete key or the scissors. Using the selection tool set to rectangle, surround your red area,
then click inside to have the ants surrounding the area. Go to selections and save to an alpha channel. Don't worry about naming it.
Create a new layer called "left collar" and move it to the top. Select the shape tool, set to ellipse, filled, white, and antialias checked. Starting about a quarter of the way from the left side of the can,
you are going to draw an ellipse that just extends below the red area and fills the can to the left edge. This is going to act as half the collar. We will remove the extra in a minute.
Don't worry if it doesn't reach the centre because you will add some white pearls that will act as buttons. When your ellipse is finished, go to selections - load from an alpha channel and your red area will
be selected. Go to selections - invert and then hit your delete key or the scissors. You should have nothing left but a small collar now. On my sample, I selected it and then added a texture. You can do that now if you wish, or you might prefer to leave yours plain.
Go to layers - duplicate, rename "right collar" then image - mirror and because the can is not in the centre, you will have to select your collar and move it into the correct position. At this point, open the small pearl image included in the zip and give her a row of buttons down the front of her dress.
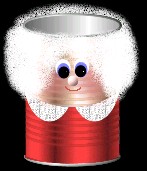
Create a new layer, name it "back hair" and arrange it at the bottom below the "backcan" layer.
Select the spray can and use these settings.
Brush... round, Size...50, Hardness...50, Opacity...50, Step...25, Density...50.
Spray some hair for Mrs. Santa so some just peeks above the back rim of the tin can.
Create a new raster layer named "front hair" and send it to the top. Continue spraying hair for Mrs. Santa. Extend it a little beyond the sides of
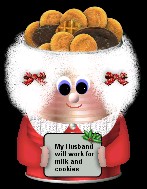
the can and give it a little bit of a rounded shape. When you are happy with it, create a new raster layer called "hairbows" and add either the bow I provided or
a bow of your choice. You can also omit the bows if you don't want them.
Create a new raster layer called "leftarm". You will be freehanding this because "I don't do vectors!!" I did mine in white to make it easier for you
to see what I was doing. Using the eyedropper first, select one of the darker shades of her dress to make the arms. Using the paintbrush set to 1, draw out an arm shape
similar to mine. Then fill it in so it is solid. If you know of an easier way to do this, then do it your way. Select your shape so it is surrounded with the ants, then
go to selections - invert and add a drop shadow. I used "black - opacity 50 blur 15, horizontal and vertical 3." Go to selections invert, and add another drop shadow, reducing blur to 6 and vertical and horizontal to 2.
Go to layers - duplicate, then image - mirror and move her right arm into the correct position.
Create a new raster layer and call it "left hand" and move it down so it is below the left arm. Using the same flesh colour as before, freehand draw a little hand. I just added a little bevel then just one regular drop shadow using the same settings as above.
Duplicate the layer, then image - mirror and move her other hand into position.
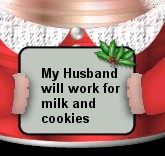
Create a new raster layer called "sign" and arrange it down so it is below the arms and hands. Using the shape tool, set to rounded rectangle, antialias,
(version psp6) set to stroked and filled with black foreground and pale green background (...or your choices) draw a little rectangle that extends to just beyond her hands. You want to make it appear she is holding it. Then
adding text in any font and colour you wish, add the saying "My husband will work for milk and cookies". I added a bit of holly from the tubes that Jasc provides with the programme. Decorate yours, though, any way you want.
The last step is to go to the layer named "candycanes". This is the same can used for Mr. Santa. You can fill with the cookies I provided in the zip file or any of your own. Mrs. Santa should now be ready to sit finished beside her husband, waiting for December 25th. to roll around.
You can now merge everything and tube it, or duplicate your working copy, merge it and save the original. That way you can go back as many times as you want and change the
cookies inside in case they all get eaten.
Thank you for attempting Mrs. Santa. If you have any problems, please feel free to email me here.
MAIN TUTORIAL LIST
This tutorial was posted at the site of "P. Ann's Place" Dec. 9, 2001 and written
by Pat Sherman.
All I ask is that you do not claim it as your own.
|
|