
If you click on the layer button to open the layer window, you will see the following.
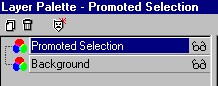
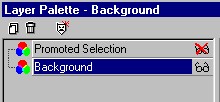
What you have to do now, is click on the glasses to hide the promoted layer (red X will appear) and then click on the background layer to make it the active one.
You are now going to add the leather effect to this solid green background.
VERSION 7
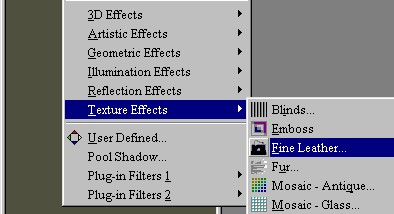
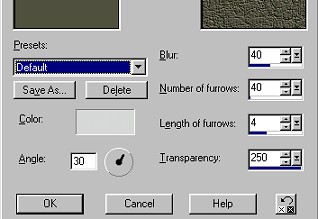
Go to the effects menu and down to "Texture" then across and down to "fine leather". The settings I used were just the basic ones listed as "default". You can see them below. Click OK and your plain green image should now look like leather.
VERSION 6 or OTHERS
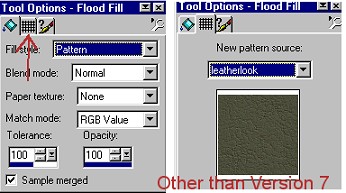
Go to the paint can and have your green leather seamless tile ready. You are going to floodlfill with a pattern. Click on the second tab to take you to the window where you will choose the green leather tile I provided you. In the drop down menu, select the tile and then you can floodfill the green area to achieve the full leather effect. You can see the images below.
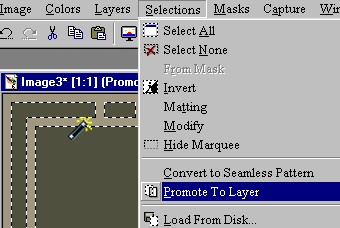
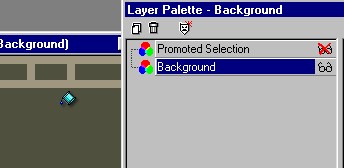
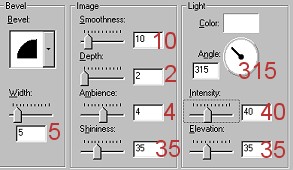
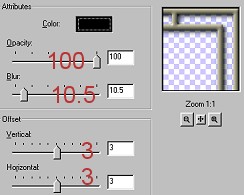
You are now going to go back to your layer menu and click on the "promoted layer" that was hidden. Make sure the red X has disappeared to make that layer visible again. You will now see your pale green lines appear. At this point, I personally, like to click on the glasses and hide the green layer you just finished. You are going to get the magic wand and click anywhere on the line areas. You should see the marching ants appear surrounding all the lines. You are going to add an "Inner bevel" and then immediately, while still selected, add a "Drop Shadow". Look at the two images below for the settings.
GO BACK GO TO THE NEXT PAGE