Meet Chris Moose - Page Two
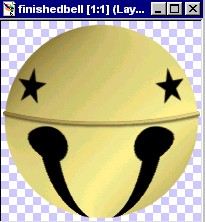
Add a new raster layer. Choose the "Shape" tool and on PSP6, I chose "Star 1". Use the antialias, no feather, solid
colour and black to make a small star on the right side above the centre ring. Click on the deformation tool, move it to a better position if
you need to, and then tilt it a
tiny bit to the left so it appears on an angle. See the image below. Double click to apply the deformation. Then choose "Layers - duplicate" and then
"Image - mirror". The last thing to do is go to "Layers - merge visible".
If you
would like to make a copy of the bell as it is to use in different projects, do so now.
We will need a much larger area to finish our moose later so in preparation, go to
"Image" - "canvas size" and change the dimensions to 400 across by 600 down. Check both horizontal and vertical centring. You can now minimize this image and store it at the bottom of your work area for later.
Are you remembering to save often???
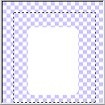
We are now going to open a new image 200 by 200 transparent 16mil. colours.
Go to the shape tool and choose "rounded rectangle" - filled, antialias, no feather and colour white. Start at
approximately 50 across and 50 down and drag over to 150 and down to 185. Go to the selection tool, rectangle and highlight
the area and click inside to have the marching ants appear around the shape.
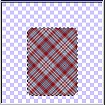
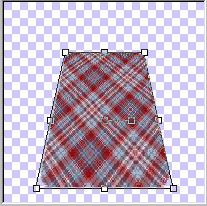
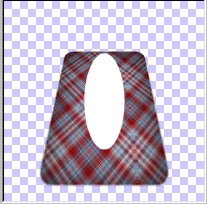
Flood fill with your chosen plaid. Click on the deformation tool and holding down the control key, move the upper corners in towards the centre but not
too much. See the picture below. You might have to adjust and move the lower corners out. Double click to apply the deformation then go to Image- sharpen, sharpen.
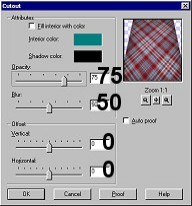
Use the selection tool again to outline the shape, click inside and regain your marching ants. Go to Effects- cut out
and apply the following settings.
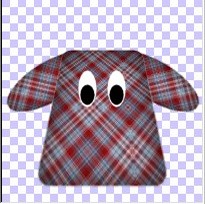
Create a new raster layer. Go to the Shapes tool and choose ellipse, filled, white, antialias, no feather.
Start at approximately 100 across, 100 down, and drag the shape until the top reaches about the level of the top of the head.
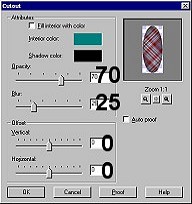
Select the area so you have marching ants surrounding the ellipse, floodfill with the plaid, and while it is still selected, apply a cutout
using the settings below.
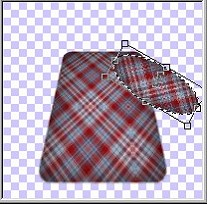
Click on the deformation tool and move the ear first over to the upper right and then swivel so it will be pointing outwards.
Do not worry that it is on top of the head. We will send it behind later. See below.
When you have it placed where you want it, double click to apply the deformation. Go to "Layers - duplicate" and then
"Image - mirror". Turn off the visibility of all layers except the two ears and go to "Layers - merge visible." Return the visibility of all
layers. Make the ears layer the active one and go to "Layers - arrange- move down". This will place them behind the head now.
Create a new raster layer and then "Layers - arrange- move to the top". Choose your ellipse shape again, same settings as for the ear,
and draw a tiny little ellipse for an eye. Switch to black and do another smaller ellipse for the black part of the eye. If you need to select and move the eye, do so now.
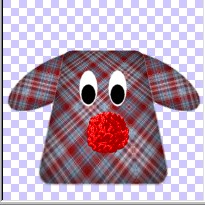
Then go to "Layers - duplicate", then "Image- mirror". Create a new raster layer for the nose. Choose the rope tube and using at size 30 draw out a nice round and layered nose. Build up the shape and make sure all the area is filled in.
Go to Effects- Colourize and use the settings 255, 255 to achieve a bright red.
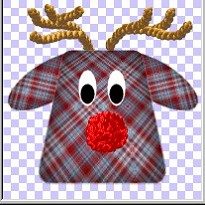
Create a new layer and send it to the bottom. Choose the rope tube again, but this time use it at size 50 and the natural colour.
Draw in the antlers and your head is finished. Go to "Layers- merge visible". Minimize this and save it at the bottom of the work screen while we open one last new image 200 by 200, transparent, 16mil. colours.
We will now do the leg.
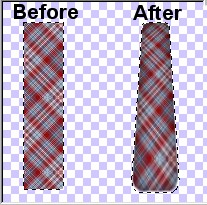
Go to the shapes tool and choose "rounded rectangle" filled, antialias checked, no feather, white and draw a rectangle
starting at points 25 across, 25 down and then drag over to 65 across and down to 185. Highlight with the marching ants then
floodfill with the plaid. Apply the deformation and adjust the top slightly just in the same manner you did the top of the head. Double click to apply the deformation.
Select again so the marching ants are surrounding the leg and then apply the cutout using the same settings as for the ear. (75, 20, 0, 0)
We are now ready to put him altogether.
PAGE ONE
PAGE THREE
MAIN TUTORIAL LIST
This tutorial was posted at the site of "P. Ann's Place" Oct.24,2001 and written
by P. Sherman.
All I ask is that you do not claim it as your own.
|
|