
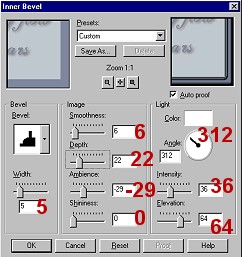
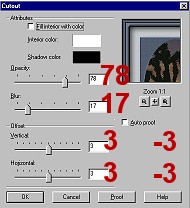
After this step has been completed, your frame is still highlighted. Go to "Selections" and then "invert" and your marching ants should be around the outside of the paler blue part just inside the frame. You are going to go to "effects" - cutout, and you need to do this step twice. Check the numbers below. The first time you will use the offset 3 and 3. Immediately go back to cutout again and this time, leave the upper numbers the same but change the offset to -3 and -3.
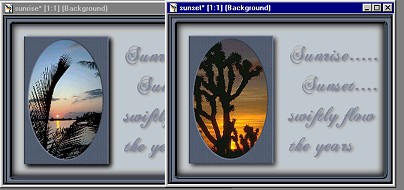
After you have completed the cutout effect on both images, they are now ready to be saved and taken to Animation Shop. This would be the perfect time to resize them if you wanted to. I would resize each picture the same % points and then "sharpen" each image before saving. I saved mine as "sunriseone.psp" and "sunsetone.psp" (just in case I messed up in preparing this tutorial and had to have a two or three). Save them to a location where you can easily call them up again as you move into the animating stage. At this point, you can close out your images, go to File and click on "Animation Shop".

BACK GO TO THE NEXT PAGE